Build an incremental clicker web game with Vue.js - Part One
planted on in: JavaScript, Vue.js and Game Development.
~5,262 words, about a 27 min read.
For a while now I have had a tingling interest in gamedev, after a few false starts trying to build things too complicated and getting burnt out I thought it would be best to keep things simple and start by building a incremental web game that I can add additional mechanics to as I progress.
This tutorial has been written alongside the natural progression of that project and is essentially a condensation of my notes for you to follow in my footsteps. The project files are also published into the public domain on GitHub here.
Who is this tutorial for?
I have written this tutorial for the kind of people who take on the #100DaysOfCode challenges and for those like myself who are experienced developers with an interest in these kind of things. I am not going into granular levels of detail instead I have linked to the documentation that I read to understand the concepts that I am writing about.
This is also a document in flux, if you find errors or wish to make amends please let me know either here in a comment or on the repository on Github as either an opened issues and/or pull request.
What are we making?
For those readers unaware, an incremental web game is any game that features an incremental mechanism, such as unlocking progressively more powerful upgrades. The game we will be making as part of this tutorial series is going to revolve around mining and will draw inspiration from the BASIC Space mines game I ported to Go a year ago.
In the BASIC Space mines game there are three resources Ore, People and food. It has Mines that collect Ore with a rate depending upon how many People your colony has per Mine. Food is purchased at the end of each cycle and People consume Food.
Ore, Mines and Food can be bought and sold and if you over work or under feed your People then you loose the game.
Over the course of this tutorial series we will be reproducing these mechanics as a web based incremental game and working out ways to expand beyond the BASIC game.
Setting up your environment
To get set up as quickly as possible I will be using the git repository from my previous post on zero config, rapid Vue.js development with ParcelJS as a starting point.
First download the repository master as a zip and then run git init from within the unzipped directory to have a blank state from which to begin.
Once done you will have the following starter project directory structure:
parcel-vue-project
├── .babelrc
├── .gitignore
├── index.html
├── package.json
└── src
    ├── App.vue
    └── main.js
Once done you will need to run npm install in the project directory to install it's node dependencies and for building you will also need ParcelJS installed.
Implementing a basic game mechanic
The game mechanic behind the majority of incremental games boils down to two things, resources collected upon the players actions and resources collected automatically. With the amount gathered by either increasing with each unlock that the player manages to achieve. To begin with our game will have one resource – Ore – that will be generated once per second and each time the player clicks a button.
We shall begin by implementing a basic interface to inform the user of how much ore they have collected. To do this, first open src/App.vue from within your project folder and amend the <template> section to look like the below:
<template>
    <div id="app">
        <h1>Ore Reserves: {{ ore }}</h1>
        <br>
        <button>Mine Ore</button>
    </div>
</template>
Next amend the data function within your <script> section with the following:
data () {
  return {
    ore: 0
  }
}
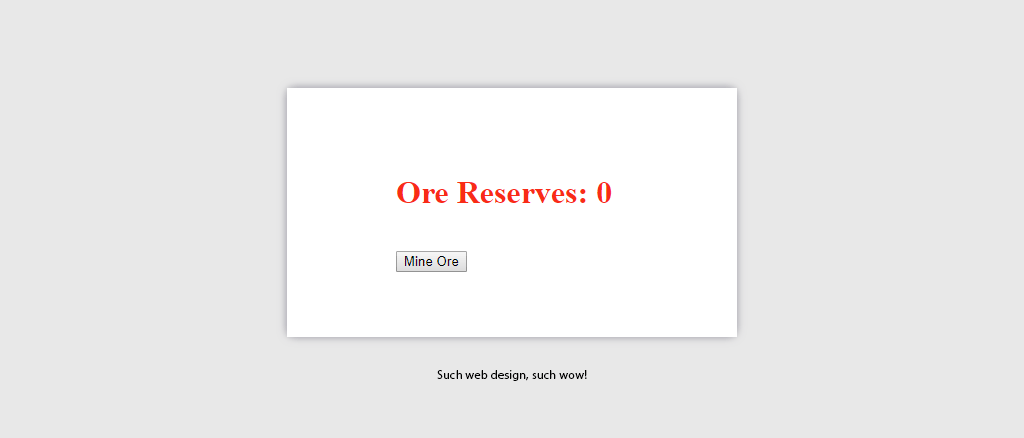
Now upon running parcel in your project directory and visiting http://localhost:1234/ you should be presented with the text Ore Reserves: 0 in a lovely red colour and an ugly button saying "Mine ore" that disappointingly does nothing when clicked.
To have something happen when the button is clicked we shall first create a mineOre method within our Vue object by adding the following below the data assignment in App.vue.
methods: {
  mineOre: function() {
    this.ore++;
  }
}
Next modify the button opening tag to be <button v-on:click="mineOre">. This attaches the new mineOre method to the click event of our button. Some may decry the moment that you click the button and see the number of "ore" increase as simply us having reproduced the first example in the Vue.js event handling documentation and they would be right. However this is just one mechanism in our game (and not even that important of one), so lets move on to the second mechanism – the automatic collection.
For the time being we shall use setInterval as a way of creating a simple game loop that executes every second. There are issues with this method that I will discuss when we come to replace it but for now it helps implement the automatic resource gathering quickly. To do so add the following code after the methods assignment in App.vue.
mounted: function() {
  setInterval(this.mineOre, 1000);
}
What this does is hook into the mounted stage of the Vue.js lifecycle and execute the mineOre method at least once very second. With all this complete upon visiting http://localhost:1234/ you will see the amount of Ore increase once per second and also when you click the mine ore button.
Adding the mines
Looking back at the BASIC Space Mines game that this is inspired by, the amount of Ore that is generated per second should be dependant upon how many Mines that the player has. First we need to amend our data function return to inclulde a mines variable like so:
data () {
  return {
    ore: 0,
    mines: 1,
  }
}
Next add an output that tells the player how many mines they have by adding adding <h1>Mines: {{ mines }}</h1> below the Ore Reserves output.
Now that we have mines added to our data structure and output to the screen, we need to modify the amount of ore mined per second to take into consideration the number of mines the player has. In the original BASIC game the amount of Ore produced by each mine was a random number between 40 and 80 but for our game that will change depending upon the level that the player has enhanced the mine to.
For the time being we shall say that each mine is able to produce 10 Ore per game loop. To do this we modify the mineOre function:
methods: {
  mineOre: function() {
    this.ore+=(10*this.mines);
  }
}
Adding the Colonists
In the original BASIC Space Mines game, Colonists didn't affect the amount of Ore that each mine produced and were simply in place to add a reason for the player to sell Ore because they consumed Food that had to be bought. As with Mines first we need to amend our data function return to include colonists and food variables like so:
data () {
  return {
    ore: 0,
    mines: 1,
    colonists: 12,
    food: 1800,
  }
}
Next modify the html to include output's for the two new variables:
<template>
    <div id="app">
        <h1>Ore Reserves: {{ ore }}</h1>
        <h1>Mines: {{ mines }}</h1>
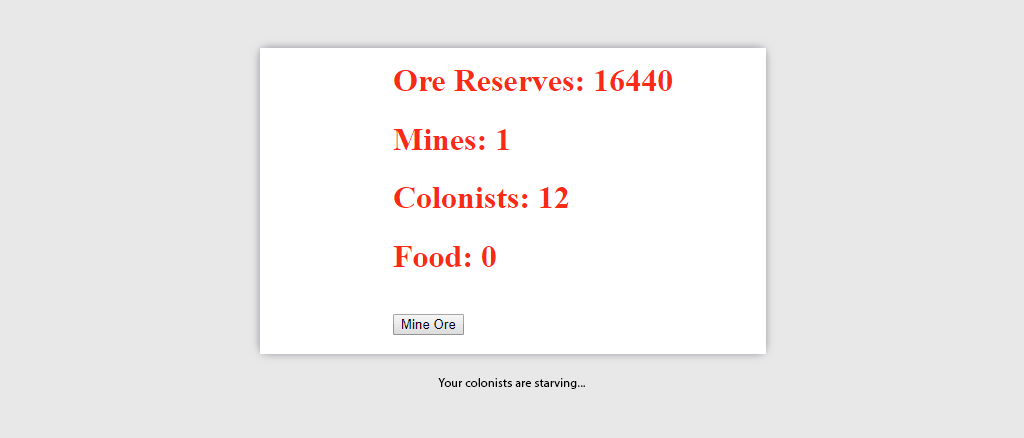
        <h1>Colonists: {{ colonists }}</h1>
        <h1>Food: {{ food }}</h1>
        <br>
        <button v-on:click="mineOre">Mine Ore</button>
    </div>
</template>
For the time being we shall say that each colonist consumes two food units per game loop in in breaking away from our BASIC roots we will modify the production of each mine to be 10 units of Ore per Colonist. To do this we need to modify our game loop to the below:
methods: {
  mineOre: function() {
    this.ore+=((10 * this.colonists) * this.mines);
    this.food-=(this.colonists * 2);
    if (this.food < 0){
      this.food = 0;
    }
  }
}
Now we have a problem, our mineOre method is now no longer just about gathering Ore and each time you click the Mine Ore button you will end up consuming food as well. What we need to do is split out the non Ore related functionality in to a new method called gameLoop so that the Mine Ore button only mines ore when clicked. We also need to modify the setInterval so it calls gameLoop instead of mineOre.
methods: {
  mineOre: function() {
    this.ore+=((10 * this.colonists) * this.mines);
  },
  gameLoop: function() {
    this.mineOre();
    this.food-=(this.colonists * 2);
    if (this.food < 0){
      this.food = 0;
    }
  }
},
mounted: function() {
  setInterval(this.gameLoop, 1000);
}
Adding a satisfaction mechanic
Eventually the amount of food in your mining colony will reduce to zero and we can imagine that all 12 of the colonists hard at work each with empty bellies. This should affect their performance in some way and in the original BASIC game this was conveyed to the player as a satisfaction rating.

Our satisfaction rating will be a float with a value between zero and one and for the time being will be influenced by the amount of food in the stores. To begin we add a satisfaction variable to our data function like so:
data () {
  return {
    ore: 0,
    mines: 1,
    colonists: 12,
    food: 1800,
    satisfaction: 1.0,
  }
}
Then we add its output to our <template> with <h1>Satisfaction: {{ satisfaction}}</h1>. Finally within our game loop we need to implement the following functionality:
- If
fooddivided bycolonistsis greater than 120 add 0.1 tosatisfaction - If
fooddivided bycolonistsis less than 80 subtract 0.2 fromsatisfaction - If
satisfactionis less than zero set it to equal zero - If
satisfactionis greater than one set it to equal one - The amount of ore mined per colonist should be ten divided by
satisfaction - If
satisfactionis less than 0.6 and there are colonists then one colonist will leave - If
satisfactionis greater than 0.6 then one colonist will join
This is done by modifying our gameLoop and mineOre methods to be the below:
methods: {
  mineOre: function() {
    this.ore+=(((10 * this.satisfaction) * this.colonists) * this.mines);
  },
  gameLoop: function() {
    this.mineOre();
    this.food-=(this.colonists * 2);
    if (this.food < 0){
      this.food = 0;
    }

    if (this.food / this.colonists > 120) {
      this.satisfaction+=0.1;
    }
    if (this.food / this.colonists < 80) {
      this.satisfaction-=0.2;
    }
    if (this.satisfaction > 1) {
      this.satisfaction = 1;
    }
    if (this.satisfaction < 0) {
      this.satisfaction = 0;
    }

    if (this.satisfaction > 0.6){
      this.colonists+=1
    } else if(this.colonists > 0){

      this.colonists-=1
    }
  }
},
Adding a buy/sell mechanic
Now upon playing the game you will see the number of colonists increase and decrease in response to the fluctuating satisfaction until you eventually run out of food. We have made the gameplay last a little longer but it's still no fun. What we need to do now is add a way that the player can buy and sell both Ore and Food so that they can keep their colony population and its satisfaction rating stable.
To do this we need to add the following new variables: credits, foodBuy, foodSell, oreBuy and oreSell to our data function:
data () {
  return {
    ore: 0,
    mines: 1,
    colonists: 12,
    food: 1800,
    satisfaction: 1.0,
    credits: 0,
    foodBuy: 100,
    foodSell: 50,
    oreBuy: 25,
    oreSell: 8,
  }
}
Next we need to add a new .vue file to our project to contain a reusable Vue component for our transactional resources. To do so create the file Resource.vue inside the new folder src/components with the following content:
{% raw %}
<template>
    <div class="resource">
        <h1>{{ displayName }}</h1>
        <div v-if="transactional" class="resourcePurchase">
            <input v-model="orderAmount" type="text" placeholder="Amount to buy/sell">
            <button v-on:click="doSell" v-bind:disabled="!canSell">Sell {{ sellPrice }} credits{{units.length > 0 ? '/' + units : '' }}</button>
            <button v-on:click="doBuy" v-bind:disabled="!canBuy">Buy {{ buyPrice }} credits{{units.length > 0 ? '/' + units : '' }}</button>
        </div>
    </div>
</template>

<script>
  export default {
    name: 'resource',
    props: {
      name: {
        type: String,
        required: true
      },
      units: {
        type: String,
        default: ''
      },
      amount: {
        type: Number,
        required: true
      },
      transactional: {
        type: Boolean,
        default: false
      },
      sellPrice: {
        type: Number,
        default: 0
      },
      buyPrice: {
        type: Number,
        default: 0
      },
      credits: {
        type: Number,
        required: true
      }
    },
    data: function(){
      return {
        orderAmount: 0
      };
    },
    computed: {
      displayName: function () {
        return this.name + ': ' + this.amount + (this.units.length > 0 ? this.units : '');
      },
      canBuy: function () {
        if (this.orderAmount < 1) { return false; }
        return (this.orderAmount * this.buyPrice) < this.credits;
      },
      canSell: function () {
        if (this.orderAmount < 1) { return false; }
        return this.amount > this.orderAmount;
      }
    },
    methods: {
      doBuy: function () {
        this.$emit('doBuy', parseInt(this.orderAmount));
      },
      doSell: function () {
        this.$emit('doSell', parseInt(this.orderAmount));
      }
    }
  }
</script>
{% endraw %}
While it may look like a lot once broken down the above is actually quite a simple component.
Looking at the <template> section you can see that we have rearranged the html so that it is contained within one <div> tag with the class resource. The reason for this is because all components in Vue.js must have only one root DOM element. Within it the resource name and amount is replaced with displayName a computed property made from the resource name and amount. Below that there is a buy/sell form that only displays if the resource has been defined as transactional.
Next within the <script> section we define the components name and then the accepted properties (props) and their validation rules followed by the components internal data and the computed properties that calculate the resources displayName and if the buy or sell buttons should be disabled.
Because component properties are supposed to be one-way communication in a downwards direction we should not modify them from within our component. Instead when the player chooses to buy or sell a resource the component emits an event that can be caught by our parent.
Returning to our src/App.vue file we now need to do a little modification to wire in our <Resource> component and get our game to a playable state. Before the export line insert import Resource from './components/Resource'; this tells JavaScript that we want to import our Resource component and assign it to the variable Resource.
Next we need to inform Vue.js that we are going to use the Resource component within our <template>. To do so insert the following just after the name property:
components: {
  Resource
},
In order to actually modify our game state when the player chooses to buy or sell either Ore or Food we need to add the following methods to our App object:
sellOre: function(amount) {
  this.credits += amount * this.oreSell;
  this.ore -= amount;
},
buyOre: function(amount) {
  this.credits -= amount * this.oreBuy;
  this.ore += amount;
},
sellFood: function(amount) {
  this.credits += amount * this.foodSell;
  this.food -= amount;
},
buyFood: function(amount) {
  this.credits -= amount * this.foodBuy;
  this.food += amount;
},
Finally to wire everything in modify your <template> with the following:
<template>
  <div id="app">
    <Resource name="Credits" v-bind:amount="credits" v-bind:credits="credits"></Resource>
    <Resource name="Ore Reserves" units="tons" v-on:doBuy="buyOre" v-on:doSell="sellOre" v-bind:amount="ore" v-bind:buyPrice="oreBuy" v-bind:sellPrice="oreSell" v-bind:credits="credits" transactional></Resource>
    <Resource name="Mines" v-bind:amount="mines" v-bind:credits="credits"></Resource>
    <Resource name="Colonists" v-bind:amount="colonists" v-bind:credits="credits"></Resource>
    <Resource name="Food" units="units" v-on:doBuy="buyFood" v-on:doSell="sellFood" v-bind:amount="food" v-bind:buyPrice="foodBuy" v-bind:sellPrice="foodSell" v-bind:credits="credits" transactional></Resource>
    <Resource name="Satisfaction" v-bind:amount="satisfaction" v-bind:credits="credits"></Resource>
    <br>
    <button v-on:click="mineOre">Mine Ore</button>
  </div>
</template>
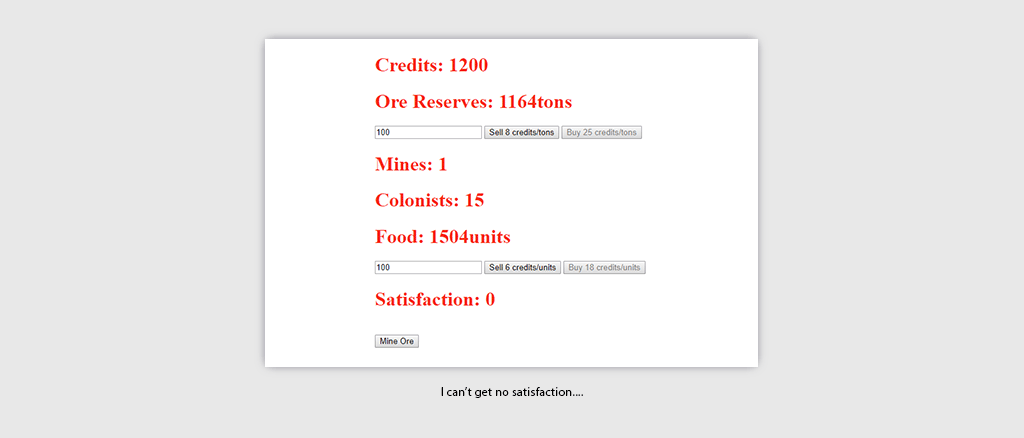
What we have done here is use our new Resource[1] component as an output for each of our game states. You can see how we are passing the properties to each instance of <Resource> and listening to the doBuy and doSell events to be passed on to our local methods.
What we have built so far
In it's current state the game is ugly but "playable" and incorporates the majority of the mechanics that the original BASIC game had. However there is a lot missing for example if you stop selling ore to buy food then you will eventually run out of food and colonists and in its present state you can only have one mine.

In part two we will work on adding the incremental mechanics to our game as well as adding more detail to both mines and colonists.
Thinking about it now the word Resource probably isn't a good name for the component as we are using it to display Satisfaction which isn't a resource but naming things is hard so for the time being the name will stay. I am open to suggestions, comments, opened issues and/or pull requests with your proposals. ↩︎